

- Why Chair Yoga Is a Serious Practice, Not a Simplified One
- Understanding Your Older Students Before You Begin
- Setting Up the Space and the Chair
- A Step-by-Step Chair Yoga Sequence for Seniors
- Common Teaching Mistakes to Avoid
- The Gap Between Knowing Poses and Knowing the Population
- Adapting Chair Yoga for Specific Conditions
- Building a Chair Yoga Program That Lasts
- FAQs
- A Final Word
You have a student in front of you. She is 72, has mild osteoporosis, and her knees ache when she bends them fully. She wants to practice yoga. She is not asking for a modified version of a "real" class. She is asking you to meet her where she is.
That moment is where chair yoga for seniors begins. Not as a compromise, but as a complete and purposeful practice.
This guide is for yoga teachers who want to teach chair yoga well — not just safely, but with the depth and intention that older adults genuinely deserve.
Why Chair Yoga Is a Serious Practice, Not a Simplified One
A lot of teachers approach chair yoga as a watered-down mat class. That framing is both inaccurate and limiting.
Chair yoga draws on the same principles as any other yoga form: breath awareness, mindful movement, progressive challenge, and the integration of body, mind, and inner awareness. The chair is a prop, not a crutch. It creates access for students whose range of motion, balance, or joint health makes floor-based practice difficult or unsafe.
For seniors specifically, the benefits are well-documented. Regular seated and supported movement improves joint mobility, reduces fall risk, supports cardiovascular function, and eases symptoms of common age-related conditions including arthritis, hypertension, and chronic lower back pain. The breath-based component also supports nervous system regulation — particularly relevant for older adults managing anxiety, grief, or social isolation.
Your job as a teacher is to understand the physiology behind each pose, not just the shape of it.
Understanding Your Older Students Before You Begin
Before you design a single sequence, you need to understand who is in the room.
Aging is not a single condition. A 65-year-old with an active lifestyle is physiologically different from a 65-year-old managing Type 2 diabetes, cardiac issues, or post-surgical recovery. Your intake process matters as much as your sequencing.
Key Areas to Assess
Musculoskeletal health. Ask about joint replacements, osteoporosis diagnoses, and areas of chronic pain. Hip replacements, for example, come with movement restrictions that directly affect how you cue seated forward folds or external rotation.
Cardiovascular status. Some students are on blood thinners or beta-blockers. Even gentle inversions — like forward bends where the head drops below the heart — require caution.
Neurological and balance concerns. Parkinson's disease, neuropathy, and post-stroke conditions affect coordination and proprioception. These students need slower transitions and more deliberate verbal guidance.
Medications. Certain medications affect blood pressure response to movement. A student on antihypertensives may become dizzy when rising from a forward bend. Knowing this before class changes how you sequence.
This is not about creating fear. It is about building the kind of trust that allows older students to feel genuinely safe — not just reassured.
Setting Up the Space and the Chair
Use a sturdy, armless chair with a firm seat. Folding chairs with padded seats are generally not ideal — they lack stability. A wooden or metal chair with four legs, placed on a non-slip surface, is the standard.
The student should sit with feet flat on the floor, hip-width apart. If their feet don't reach the floor comfortably, place a folded blanket beneath them. The spine should be able to lengthen away from the seat without the student gripping the chair for support.
Keep the space clear of obstacles. Older adults with balance concerns need unobstructed pathways. In a group setting, allow generous space between chairs so you can move around each student without disruption.
A Step-by-Step Chair Yoga Sequence for Seniors
The following sequence is designed for a 45 to 60 minute class. It moves from grounding and breath awareness through gentle mobilisation into the main practice, and closes with supported relaxation. Adapt timing and intensity based on your group.
1. Seated Grounding and Breath Awareness (5 minutes)
Begin with the student seated upright, feet flat, hands resting on thighs.
Invite them to close their eyes or soften their gaze downward. Guide them to feel the weight of the body on the chair, the contact of the feet with the floor. This is not a perfunctory opening. For many older adults, arriving in the body after a day of physical discomfort or mental preoccupation takes real time.
Introduce three-part breathing — diaphragmatic, then ribcage, then upper chest. Keep the instruction sensory and simple: feel the belly rise, feel the ribs expand, feel the collarbones lift slightly. Avoid overcueing. Let the breath do its work.
2. Neck and Shoulder Release (5 minutes)
Slowly guide the student through:
- Neck rolls (half circle only): Ear to shoulder, chin to chest, ear to the other shoulder. Do not take the head back. For students with cervical issues, limit to side tilts only.
- Shoulder shrugs: Inhale, lift the shoulders toward the ears. Exhale, release. Repeat three to five times.
- Shoulder circles: Slow, full circles forward and back. Watch for students who hold their breath here.
Speak to the breath throughout. The movement is secondary to the breath awareness.
3. Spinal Mobilisation (8 minutes)
Seated Cat-Cow (Marjaryasana-Bitilasana variation): Hands on knees. Inhale, lift the chest and gently arch the lower back. Exhale, round the spine and drop the chin. Move slowly. This is often where students begin to feel the practice settle in.
Seated Twist (Parivrtta Sukhasana variation): Inhale to lengthen the spine. Exhale, rotate gently to the right, placing the left hand on the right knee and the right hand on the back of the chair. Hold for three to five breaths. Repeat on the left. Remind students not to use the chair back to force the twist deeper — the rotation comes from the thoracic spine, not the neck.
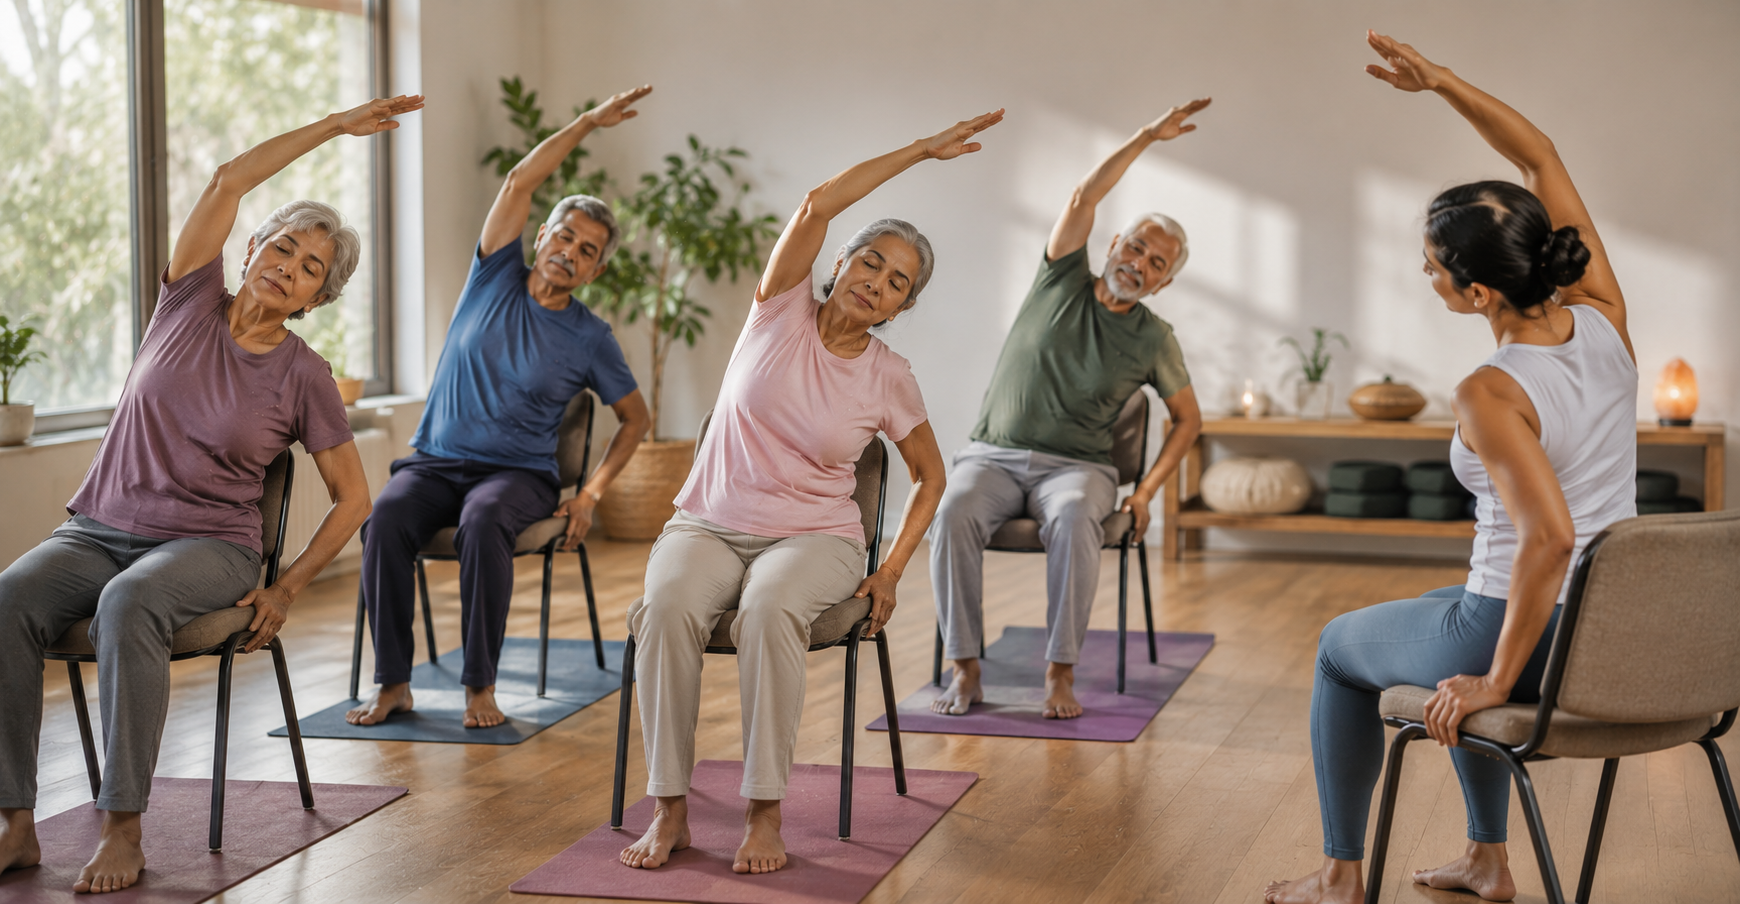
Side Bend: Inhale, raise the right arm. Exhale, lean gently to the left, allowing the left hand to slide down the left leg for support. Hold for two to three breaths. Repeat on the other side. Watch for students who collapse into the side bend rather than lengthening through it.
4. Hip and Leg Mobilisation (10 minutes)
Seated Marching: Alternate lifting the knees gently, coordinating with the breath. This activates the hip flexors and improves circulation in the lower limbs.
Ankle Circles: Extend one leg, rotate the ankle in full circles, then reverse. Particularly valuable for students with oedema or poor circulation.
Seated Warrior I Preparation: Sit sideways on the chair, one leg extended behind with the foot flat on the floor, the other leg bent at the front. Inhale, lengthen the spine. Exhale, gently press into the back foot. This is not a deep lunge — it is an exploration of hip extension. Place your hands on the student's hips if they need help orienting the pelvis.
Figure-Four Stretch (Seated Pigeon variation): Cross the right ankle over the left knee, flexing the right foot. Sit tall. For students with hip replacements, check their surgeon's guidelines before including this. Some protocols restrict this movement entirely.
5. Upper Body Strength and Awareness (7 minutes)
Seated Eagle Arms (Garudasana arms): Cross the right arm under the left at the elbows, wrap the forearms, and lift the elbows to shoulder height. Hold for three breaths. This opens the upper back and stretches the muscles between the shoulder blades — an area of chronic tension for many older adults.
Cactus Arms: Extend the arms to the sides at shoulder height, bend the elbows to 90 degrees. Inhale, press the arms back gently. Exhale, bring the forearms forward to meet. This builds awareness in the chest and shoulders without loading the joints.
Seated Forward Fold (gentle): Inhale, lengthen the spine. Exhale, hinge forward from the hips, letting the hands slide down the shins. Do not push students into depth. The intention is a gentle hamstring release and a moment of inward focus. Watch blood pressure responses here, particularly in students who rise quickly from this position.
6. Balance and Grounding (5 minutes)
Seated Tree Pose (Vrksasana variation): Place the sole of the right foot on the inner left calf — never the inner knee. Bring the hands to the heart in Anjali Mudra. Hold for five breaths. This builds proprioceptive awareness even from a seated position.
Supported Standing (optional, for able students): Have the student stand behind the chair, hands resting lightly on the back for support. Guide a gentle Tadasana awareness — feet hip-width apart, weight evenly distributed, spine long. Even 60 seconds of conscious standing carries real value for students who spend most of their day seated.
7. Pranayama and Relaxation (10 minutes)
Nadi Shodhana (alternate nostril breathing): This technique, which alternates the breath between the left and right nostrils, is deeply balancing for the nervous system. It is accessible for most seniors and carries no contraindications for the majority of this population. Guide three to five rounds.
Seated Savasana or Supported Relaxation: The student remains seated, hands in the lap or on the thighs, eyes closed. Guide a slow body scan from the crown of the head to the soles of the feet. Allow five minutes of stillness. Do not rush this closing. For many older adults, this is the part of the practice they carry home.
Common Teaching Mistakes to Avoid
Rushing transitions. Older adults need more time between positions. A transition that takes a younger student three seconds may take a senior fifteen. Build this into your timing from the start.
Over-assisting. Physical adjustments require explicit consent and careful technique. When in doubt, use verbal cues and demonstration rather than hands-on guidance.
Ignoring pain signals. Teach your students the difference between the sensation of a stretch and the sensation of pain. Older adults sometimes push through pain because they assume it is normal. It is not.
Underestimating your students. Chair yoga is not easy yoga. It requires concentration, body awareness, and breath coordination. Treat your older students as the capable, intelligent adults they are.
The Gap Between Knowing Poses and Knowing the Population
There is a meaningful difference between a yoga teacher who can demonstrate chair yoga poses and one who actually understands the geriatric body.
The second teacher knows why a student with Parkinson's needs slower verbal cues and shorter holds. They understand how osteoporosis changes the risk profile of a spinal twist. They know what questions to ask before a student with a recent hip replacement joins the class. They have studied the physiology, not just the sequence.
This is the gap that most 200-hour teacher training programs leave open. They teach you the poses. They do not teach you the populations.
If you are working with older adults regularly — or want to build a practice that serves geriatric students with real clinical confidence — the approach to holistic health in yoga matters as much as the asana library you carry. And the work of teachers like those featured in Masterji's unique yoga project shows what becomes possible when a teacher commits to serving this population with genuine depth.
hellomyyoga's Geriatric Yoga Care teacher training is designed by doctors and yoga chikitsa acharyas specifically to close this gap. It is not a general yoga certification with a senior-friendly module added on. It is a clinically grounded specialisation built for teachers who want to work with older adults safely and with authority. You can explore the program at hellomyyoga.com.
Adapting Chair Yoga for Specific Conditions
Arthritis
Avoid deep joint loading. Prioritise gentle range-of-motion work and warmth. Encourage students to practice in the morning after joints have had time to loosen, rather than immediately upon waking. Warm the hands before Anjali Mudra by rubbing them together.
Osteoporosis
Avoid deep forward folds with a rounded spine — spinal flexion under load is a fracture risk. Prioritise extension and neutral spine positions. Twists are generally safe when performed with length in the spine and without forcing.
Hypertension
Avoid breath retention (kumbhaka). Keep movements slow and avoid positions where the head drops significantly below the heart. Nadi Shodhana without retention is well-suited to this population.
Post-Stroke
Work with the student's healthcare team. Hemiplegia or weakness on one side requires asymmetrical sequencing. Prioritise awareness of the affected side without forcing symmetry.
Cognitive Decline (mild)
Use simple, consistent language. Repeat cues in the same words each class. Familiar sequences reduce anxiety and build confidence. Rhythm and breath can be anchoring even when verbal comprehension is limited.
Understanding how age-related conditions affect women specifically is also worth studying. Research on health issues in middle-aged and older women offers useful context for teachers working with this demographic.
Building a Chair Yoga Program That Lasts
If you are teaching chair yoga in a community centre, care home, or private studio, consistency matters more than variety. Your students benefit from a recognisable structure they can anticipate. Novelty is far less important than safety and trust.
Consider a short intake conversation before a new student joins. Ask about their health history, their goals, and what they hope to feel at the end of class. That conversation will tell you more than any intake form.
Document your sequences. Note what worked, what needed more time, and where students struggled. Over months, this becomes a meaningful clinical record of your teaching practice.
Stay curious about the deeper tradition behind what you teach. Yoga chikitsa — the therapeutic application of yoga — carries centuries of knowledge. The more you understand that lineage, the more purposeful your teaching becomes. The work of teachers like Deepak Sachdeva in healing yoga reflects how that tradition continues to inform contemporary practice.
FAQs
What is chair yoga for seniors?
Chair yoga for seniors is a yoga practice in which a sturdy chair is used as a prop to support seated and standing poses. It is designed for older adults who may have limited mobility, balance concerns, or joint conditions that make floor-based yoga difficult. The practice includes breath work, spinal mobilisation, hip and shoulder movement, and relaxation techniques.
Is chair yoga safe for seniors with osteoporosis?
Chair yoga can be safe for seniors with osteoporosis when taught by a teacher who understands the condition. Key adaptations include avoiding deep spinal flexion with a rounded back, prioritising neutral and extended spine positions, and keeping movements slow and controlled. Teachers should always ask about bone density diagnoses during intake.
How long should a chair yoga class for seniors be?
A well-structured chair yoga class for seniors typically runs between 45 and 60 minutes — enough time for a grounding opening, full-body mobilisation, pranayama, and a proper closing relaxation. Shorter sessions of 20 to 30 minutes can work well for students in care settings where attention or energy is more limited.
Do yoga teachers need special training to teach seniors?
A standard 200-hour yoga teacher certification does not cover the clinical knowledge needed to teach seniors with conditions such as osteoporosis, post-stroke recovery, Parkinson's disease, or joint replacements. Specialised training in geriatric yoga care gives teachers the physiological understanding and clinical confidence to work with this population safely.
Can chair yoga help with fall prevention in older adults?
Yes. Chair yoga supports fall prevention by improving proprioception, strengthening the muscles around the hips and ankles, and building balance through supported standing and seated balance work. The breath-based component also supports nervous system regulation, which affects coordination and reaction time.
What conditions should a yoga teacher be cautious about when teaching seniors?
Teachers should exercise particular caution with students who have had recent hip or knee replacements, those with severe osteoporosis, students managing hypertension or cardiac conditions, and those with neurological conditions such as Parkinson's disease or post-stroke effects. A thorough intake process — and, where appropriate, communication with the student's healthcare provider — is essential.
How is chair yoga different from seated stretching?
Chair yoga integrates breath awareness, mindful attention, and the philosophical principles of yoga alongside physical movement. Seated stretching is primarily mechanical. The difference lies in the quality of attention brought to the practice and the inclusion of pranayama, meditation, and inner awareness — which are central to yoga but absent from generic stretching routines.
A Final Word
Teaching chair yoga to seniors is not a lesser form of yoga teaching. It is one of the most demanding and most meaningful things you can do as a practitioner.
Your older students carry decades of lived experience into the room. They deserve a teacher who has done the work to meet them with skill — not just goodwill.
If you are ready to build that skill with clinical depth and the guidance of doctors and yoga chikitsa acharyas, explore what hellomyyoga offers at hellomyyoga.com.